
In the world of music, clarity and control over sound are everything. Whether you’re a budding pianist, a seasoned violinist, or a music educator, the quality of your practice environment plays a pivotal role in performance and progress. This is where Music Room Soundproofing and acoustic treatment come into the picture.
Creating a well-treated music practice room isn’t just about reducing noise, it’s about shaping sound to improve focus, protect hearing, and ensure privacy. Whether you’re designing a home studio or a conservatory practice room, understanding acoustic treatment is key to building an optimal musical environment.
In this guide, we’ll dive into the essential components of acoustic treatment, explore the best practices for soundproofing, and provide you with practical tips to create an ideal space for musical excellence.
Why Acoustic Treatment Matters in Music Practice Rooms
Unlike performance halls or recording studios, practice rooms often face unique acoustic challenges:
- Limited space can lead to sound buildup or flutter echoes.
- Close proximity to other rooms means sound leakage is a real concern.
- Uncontrolled reflections distort what musicians hear, affecting tone and technique.
Without proper acoustic treatment, a practice room can become a source of frustration rather than a space for growth. Effective music room soundproofing not only enhances the listening experience but also prevents sound from disturbing adjacent spaces.
Benefits of Proper Acoustic Treatment
- Improved clarity and precision in sound
- Reduced ear fatigue during long sessions
- Isolation from external and internal noise
- Better focus and fewer distractions
- Enhanced sound quality for recordings or online lessons
Key Elements of Music Room Soundproofing
Soundproofing and acoustic treatment are often used interchangeably, but they serve different purposes:
- Soundproofing focuses on blocking sound from entering or exiting a room.
- Acoustic treatment is about shaping the sound within the room for clarity and balance.
Both are necessary for an effective music room. Here’s how to incorporate both strategies:
1. Soundproofing: Keeping Sound In and Noise Out
When practicing music, it’s crucial to contain the sound within the room while also preventing external noise from seeping in. Here are some tried-and-tested soundproofing techniques:
Wall and Ceiling Treatment
- Use mass-loaded vinyl (MLV) or double drywall with Green Glue between layers to add mass and damping.
- Install decoupled framing systems to minimize structural sound transfer.
- Add acoustic insulation like mineral wool inside walls for low-frequency control.
Floor Soundproofing
- Lay down high-density rubber underlayments beneath carpet or flooring.
- Use platforms or risers for drums and pianos to reduce vibrational transfer.
Doors and Windows
- Install solid-core doors with perimeter seals.
- Use double- or triple-pane acoustic windows or add window plugs for additional isolation.
Airtightness
- Seal all gaps and cracks using acoustic caulk.
- Use door sweeps and weatherstripping for better door seals.
Acoustic Treatment: Shaping Sound Inside the Room
Once your room is properly soundproofed, the next step is to treat the acoustics within. The goal is to create a balanced, non-reverberant space where music sounds natural and clear.
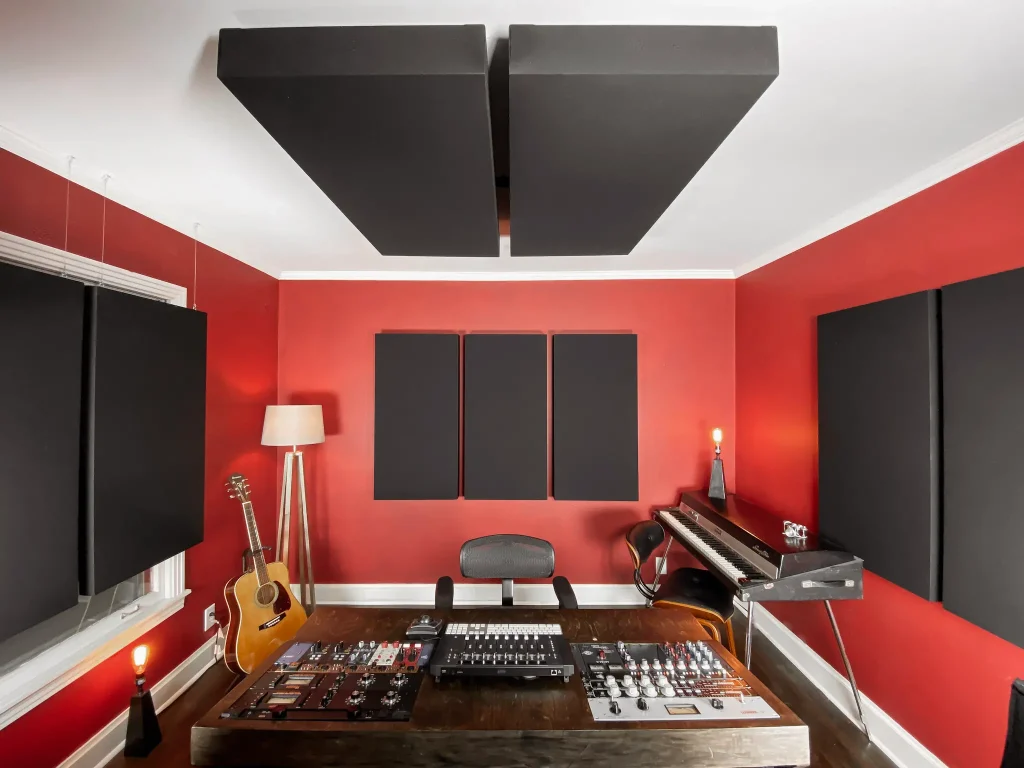
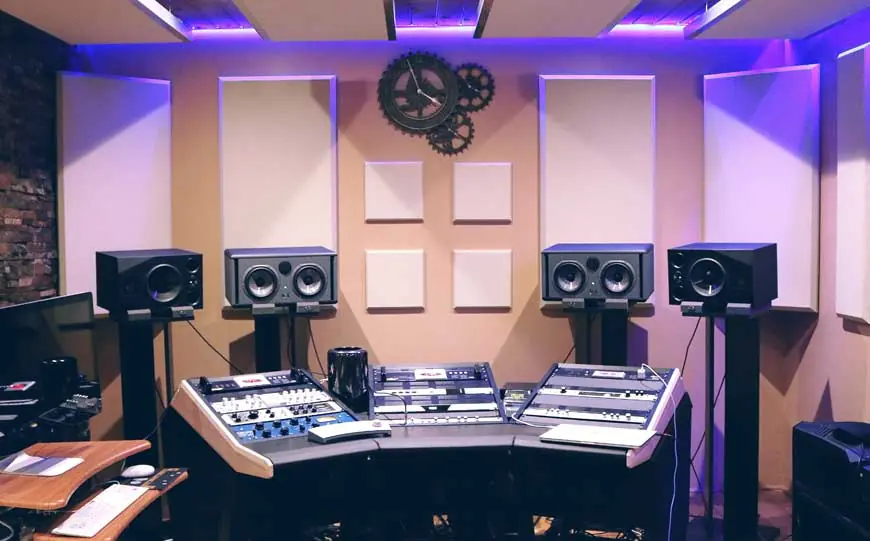
2. Absorption Panels
Absorption panels reduce unwanted reflections and reverberation.
- Use acoustic panels made from high-density fiberglass or acoustic foam on parallel walls.
- Focus on first reflection points, places where sound reflects directly to your ears from the source.
- Panels should cover at least 20-30% of wall space for effective absorption.
3. Bass Traps
Low-frequency buildup can muddy the sound in small rooms.
- Install bass traps in all vertical corners (floor-to-ceiling).
- Use broadband traps for better control across frequencies.
4. Diffusers
To prevent a room from sounding too “dead,” diffusers scatter sound in multiple directions.
- Place diffusers on rear walls or ceilings.
- Use QRD (Quadratic Residue Diffusers) or skyline diffusers for best results.
5. Ceiling Clouds
These suspended panels absorb sound waves that bounce off the ceiling.
- Ideal for rooms with hard, reflective ceilings.
- Help control flutter echo and overall room reverb.
Designing for Different Types of Music Practice
Every instrument interacts differently with room acoustics. Here’s how to tailor acoustic treatment depending on your needs:
Piano Rooms
- Add thick rugs under the piano to absorb low-end resonance.
- Use ceiling clouds and side-wall panels to control brightness.
Vocal Practice Rooms
- Focus on early reflection control with absorption panels.
- Add corner bass traps to tame boominess from lower vocal registers.
String and Wind Instruments
- Include diffusers to retain natural instrument resonance.
- Treat behind the player and on side walls for balanced reflections.
Drum Rooms
- Require heavy bass trapping and floor isolation.
- Consider floating floors or drum risers for vibration control.
Common Mistakes to Avoid in Acoustic Design
Even well-intentioned setups can go wrong. Avoid these pitfalls:
- Overusing foam panels: Not all foams are created equal; many cheap panels do little for bass frequencies.
- Ignoring room dimensions: Square rooms create standing waves—try to break symmetry with diffusers or angled walls.
- Neglecting HVAC noise: Always isolate HVAC ducts and use acoustic baffles or silencers.
- Skipping measurements: Use tools like Room EQ Wizard (REW) to measure frequency response and reverb time.
DIY vs. Professional Installation: What’s Right for You?
DIY Acoustic Treatment
- Ideal for budget-conscious musicians.
- Plenty of quality DIY panel tutorials available online.
- Great if you’re handy and have a basic understanding of acoustics.
Professional Design and Installation
- Recommended for schools, conservatories, and serious home studios.
- Ensures precise treatment, especially for complex rooms or multi-instrument setups.
- Comes with acoustic testing and tailored recommendations.
Final Thoughts: Creating the Ideal Practice Space
Designing an acoustically treated music practice room is an investment in your craft. With the right balance of music room soundproofing and acoustic treatment, you can create a space that supports focused practice, honest feedback, and better performance outcomes.
Key Takeaways:
- Soundproofing is about isolation, keeping sound in and noise out.
- Acoustic treatment is about improving sound quality within the room.
- Each element from absorption panels to bass traps plays a role in enhancing your environment.
- Tailor your setup based on the instruments played and the room size.
- Avoid common mistakes and consider professional help for complex designs.

Ready to Transform Your Music Practice Room?
At SoundKrafted, we believe that every musician deserves a space where sound flows freely without distortion, distractions, or disruption. Whether you’re fine-tuning your technique, preparing for a recital, or simply enjoying the art of music, your environment should support your goals. That’s where we come in.
With years of experience in music room soundproofing and acoustic treatment, SoundKrafted delivers professional-grade solutions that are tailored to your unique needs. We don’t believe in one-size-fits-all. Every room has its own acoustic fingerprint and we’re here to optimize it.
Why Choose SoundKrafted?
- Custom-designed soundproofing for music practice rooms and studios.
- Complete wall, floor, ceiling, window, and door isolation systems.
- Visual designs that enhance aesthetics without compromising performance.
- Expert consultation, design, fabrication, and installation from start to finish.
Whether you’re building from scratch or upgrading an existing room, our team is ready to guide you every step of the way.
Take the first step toward a better-sounding future and call SoundKrafted today, or visit our website to schedule your free consultation. Let us help you turn your music room into a space where you can focus, create, and excel.