
Creating a recording studio that delivers clean, professional sound is every creator’s dream. Whether you produce music, podcasts, voiceovers or video content, controlling noise and unwanted reflections is essential. A well soundproofed space improves audio clarity, makes mixing easier and elevates the overall quality of your work. Many people assume soundproofing is complicated or expensive, but with the right approach and materials you can transform any room into a productive studio environment.
This long form guide walks you through each stage of the process. You will learn how sound behaves, how to block outside noise, how to control echoes inside the room and how to choose effective soundproofing materials. If you follow the steps carefully, you will create a studio that is comfortable, quiet and ready for professional production.
Understanding the Basics of Soundproofing
Before you begin, it helps to understand what soundproofing actually involves. Many people confuse soundproofing with acoustic treatment, yet the two serve different purposes. Knowing the difference will help you choose the right products and strategies.
Soundproofing vs Acoustic Treatment
Soundproofing focuses on blocking unwanted sound from entering or leaving the room. The goal is to stop outside noise like cars, neighbors or HVAC systems from interrupting your recording sessions. It also stops your music or vocals from escaping and disturbing others. To achieve this, you focus on density and isolation.
Acoustic treatment focuses on improving the sound inside the room. This reduces echo, flutter, reverb and other reflections that can affect clarity. Acoustic treatment uses absorbers, diffusers and bass traps to shape the internal sound.
In this guide, the focus is primarily on soundproofing, although you will see how both work together to create a balanced studio.
Step One: Assess Your Space
Every room reacts differently to sound. Before installing anything, take time to understand the problem areas. This helps you avoid unnecessary purchases and choose the best materials.
Identify Noise Sources
Start by identifying internal and external noise. Some common sources include:
- Road traffic
- Airplanes
- Neighbors or household members
- Appliances like refrigerators and air conditioners
- Outdoor construction
- Vibration from plumbing or mechanical systems
Stand quietly in your room for a few minutes and listen. Note which walls the noise seems to pass through. Sometimes the sound comes from above or below, especially in apartment buildings.
Examine the Room’s Construction
The performance of your soundproofing efforts depends on how the room is built. Look at the following elements:
- Wall type (drywall, concrete, wood)
- Window size and thickness
- Door material
- Ceiling height
- Floor composition
Rooms with thin drywall, hollow doors and large windows usually need more soundproofing work.
Step Two: Seal Air Gaps and Cracks
Sound travels easily through small openings. These leaks become pathways for noise, so sealing gaps is the most affordable and effective first step.
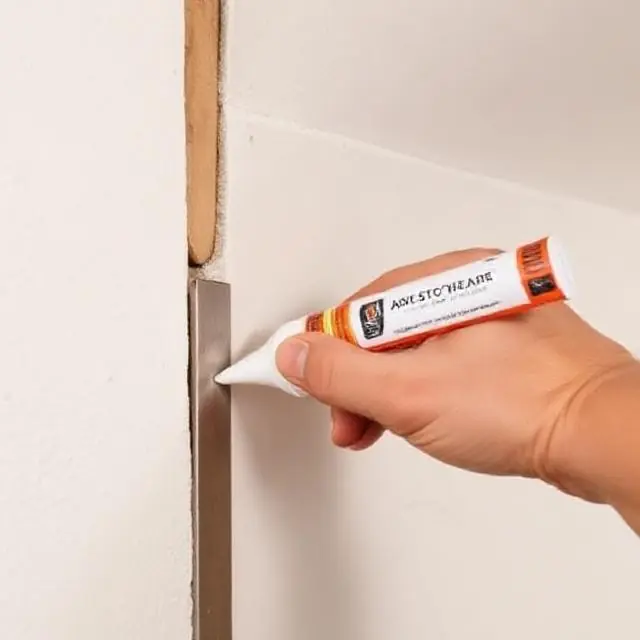
Common Areas to Seal
- Gaps around door frames
- Spaces between baseboards and flooring
- Cracks in walls
- Outlets and electrical boxes
- Window frames
Use acoustic sealant or high quality caulk to close these gaps. Acoustic caulk remains flexible over time, which helps maintain performance.
Door Sweeps and Weatherstripping
A significant amount of sound escapes under doors. Installing a door sweep and weatherstripping improves the seal and reduces sound leakage. This simple fix often makes an immediate difference.
Step Three: Upgrade the Door and Windows
Doors and windows are the weakest points in most rooms. If noise issues are severe, upgrading these elements becomes essential.
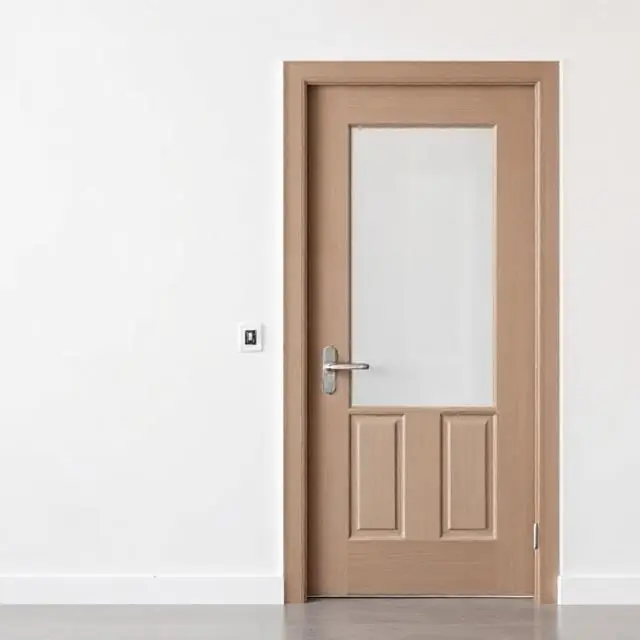
Use Solid Core Doors
Hollow core doors lack density. Replacing them with solid wood or solid core doors greatly increases sound isolation. This heavier material blocks sound more effectively.
Improve Window Sound Isolation
If you have thin or single pane windows, soundproofing becomes more challenging. Here are options that help:
- Install double glazed or laminated glass windows
- Add soundproof window inserts
- Use heavy blackout curtains
- Seal all edges with acoustic caulk
Window inserts are popular because they create an extra air layer that absorbs sound.
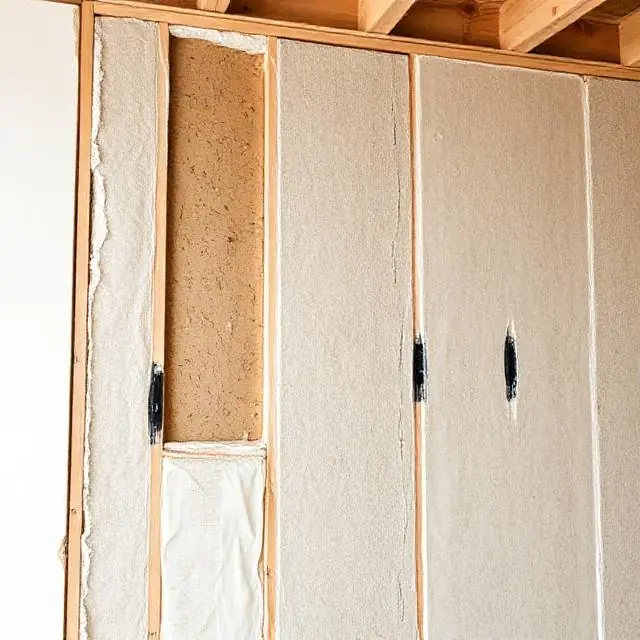
Step Four: Add Mass to the Walls
Soundproofing relies heavily on mass. The more mass a wall has, the harder it is for sound to pass through. If your walls are thin, adding layers helps significantly.
Popular Wall Soundproofing Materials
- Mass loaded vinyl (MLV)
- Additional layers of drywall
- Soundproof drywall products
- Plywood or OSB backing boards
- Green Glue noise proofing compound between drywall layers
MLV is one of the most effective materials because it increases mass without adding much thickness. When combined with extra drywall layers and Green Glue, the results are excellent.
Staggered Studs or Double Walls
If you are building from scratch or doing major renovations, consider staggered stud or double wall construction. These designs prevent sound vibrations from traveling directly through the structure.
Step Five: Soundproof the Ceiling
Ceilings often transmit noise from above, especially in apartments or multi story buildings.
Methods for Ceiling Isolation
- Install resilient channels
- Add MLV beneath drywall
- Create a decoupled ceiling system
- Use acoustic insulation between joists
Resilient channels prevent vibrations from passing directly into the ceiling structure, improving isolation.
Step Six: Soundproof the Floor
Floor soundproofing reduces both impact noise and airborne sound.
Floor Soundproofing Options
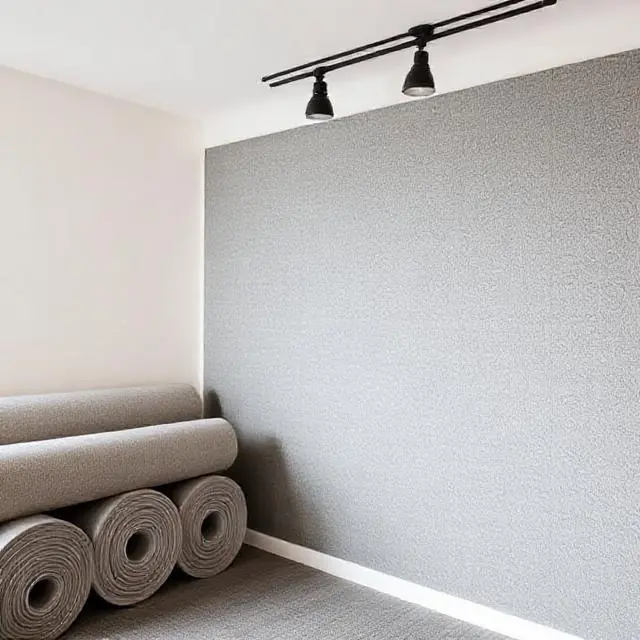
- Carpets and thick rugs
- Soundproof underlayment
- Rubber mats
- Floating floor systems with acoustic pads
Rubber based materials are highly effective at absorbing impact noise such as footsteps.
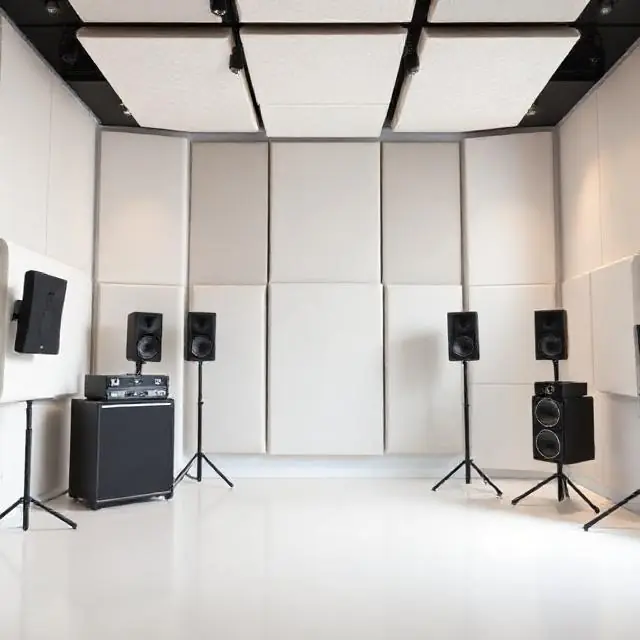
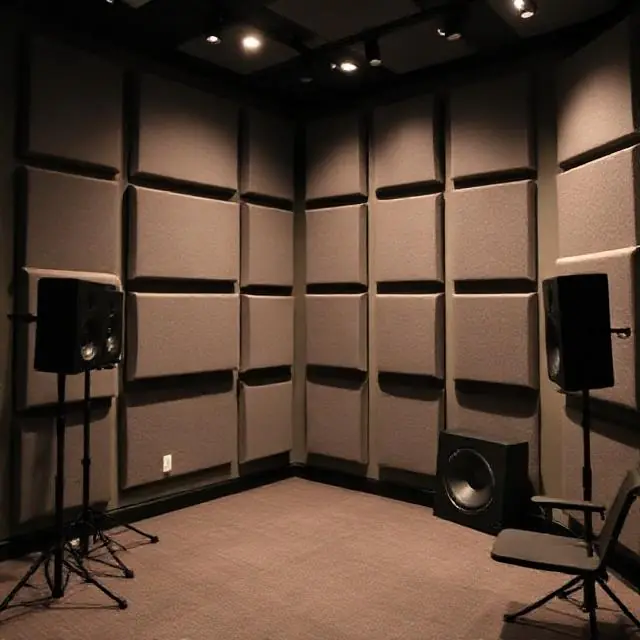
Step Seven: Acoustic Treatment for Improved Sound Quality
Once you block outside noise, treat the room’s internal acoustics. This ensures accurate monitoring and clean recordings.
Important Acoustic Treatment Elements
Bass traps
Used in corners to control low frequency build up.
Acoustic panels
Placed on walls to absorb mid and high frequency reflections.
Diffusers
Scatter sound waves to create a more natural listening environment.
Placement Tips
- Start by treating first reflection points on walls.
- Add bass traps in vertical and horizontal corners.
- Use ceiling clouds above the mixing position for better clarity.
You do not need to treat every surface. Focus on strategic placement for optimal results.
Step Eight: Test and Fine Tune Your Studio
After installation, record sample audio to test the room. Note any remaining noise issues or uneven reflections. Sometimes small adjustments make a big difference.
What to Listen For
- Persistent low frequency rumble
- Echo or unwanted reverb
- Outside noise still entering
- Vibrations from appliances or HVAC systems
Add more acoustic treatment or adjust placement if needed.
Why People Trust SoundKrafted.com
Choosing the right materials and experts can dramatically improve your soundproofing results. At SoundKrafted.com we provide professional grade soundproofing solutions for studios, home theaters, office spaces, podcast rooms and more. People trust SoundKrafted because we combine high quality materials with expert guidance that makes the process easier.
What Makes SoundKrafted a Reliable Choice
- Premium soundproofing and acoustic materials for all types of spaces
- Solutions that balance performance, durability and affordability
- Expert support to help you choose the right products
- Materials designed for long term acoustic stability
- Proven results trusted by musicians, podcasters and production teams
Whether you need mass loaded vinyl, acoustic panels, bass traps or complete soundproofing advice, our team is ready to help you build a studio that performs at a professional level.
Conclusion
Soundproofing your recording studio is one of the most important steps toward achieving professional quality audio. By understanding how sound works, sealing gaps, adding mass, upgrading doors and windows and treating internal acoustics, you can transform any room into an efficient production space. While soundproofing can feel overwhelming at first, following these step by step strategies makes the process manageable and cost effective.
If you are ready to build a quiet, high performance studio using dependable materials, explore the soundproofing solutions available at SoundKrafted.com. With the right products and expert support, your recording environment can reach a level of clarity and consistency that elevates every project you create.