
Ever walked into a conference room where every word echoes? Or tried recording audio in a studio where machinery rumble ruins takes? These frustrations cost businesses thousands in lost productivity and poor-quality output. Here’s the thing though sound dampening sheets fix these problems faster than you’d think.
Let me show you exactly how these materials work and where they make the biggest difference. No fluff. Just practical advice you can use today.
The Real Problem with Noisy Spaces
Thin metal panels vibrate constantly. HVAC ducts amplify airflow turbulence. Equipment housings rattle from internal mechanisms. Every vibration creates noise that spreads throughout buildings.
Think about your typical office. Metal filing cabinets hum. Ventilation grills buzz. Even walls vibrate from nearby machinery. All these small vibrations add up to serious acoustic problems.
Sound dampening sheets attack this at the source. They stick to vibrating surfaces and resist movement. When panels try shaking, the dampening material fights back. This converts kinetic energy into tiny amounts of heat. Result? Vibration stops before creating noise.
Material Options That Actually Perform
Butyl-Based Products
Premium sound dampening sheets use butyl rubber compounds. These feel sticky and heavy exactly what you want. The weight provides mass resisting vibration. The adhesive creates permanent bonds ensuring materials never peel.
Good butyl products weigh around 0.5 to 1.0 pounds per square foot. They handle temperature swings from freezing cold to scorching heat without breaking down.
Local suppliers in Karachi, Lahore, and Islamabad stock various brands. Expect to pay PKR 800-1,500 per square foot. Higher prices usually mean better quality and longer life.
Economy Asphalt Options
Budget-conscious buyers sometimes choose asphalt-based materials. These cost less but come with tradeoffs. Asphalt softens when hot. It might smell funny in summer. Performance drops compared to butyl.
Where do asphalt products make sense? Hidden areas like equipment room floors. Spaces where heat doesn’t build up. Applications where budget matters more than maximum performance.
For critical installations though? Skip asphalt. Invest in butyl. The performance difference justifies the extra cost.
Secondary Barrier Materials
After dampening vibration, add barriers blocking remaining noise. Closed-cell foam sheets work great for this. Mass-loaded vinyl provides even better performance.
Typical foam thickness runs 6-10mm. Thicker blocks more sound but takes up space. Choose based on your specific needs and available room for treatment.
Where Treatment Delivers Maximum Impact
HVAC Ductwork
Metal ducts naturally amplify sound. Air rushing through creates turbulence. The duct walls vibrate and broadcast this noise throughout buildings. Every room connected to ducts hears the rumble.
Apply sound dampening sheets to duct exteriors. The transformation feels dramatic. That constant low hum? Gone. Air still flows normally. But the duct stops acting like a giant speaker.
Focus on main trunk lines first. These large ducts move the most air and create the loudest noise. Treat branch ducts second if budget allows.
Equipment Enclosures
Compressors, generators, and mechanical equipment vibrate intensely. Standard metal enclosures amplify these vibrations. The panels basically turn into drums broadcasting noise everywhere.
Cover interior enclosure surfaces with dampening material. The panels stop resonating. Equipment still runs. But the housing stays quiet instead of amplifying every vibration.
Access panels and doors need treatment too. Otherwise they rattle and leak sound. Complete coverage delivers complete results.
Office Partitions
Modern offices use lightweight partition systems. These thin panels transmit vibration easily. Someone bumps a partition and the whole row shakes. Sound travels right through.
Strategic sound dampening sheets application stiffens partitions. They stop transmitting vibration. Privacy improves. Noise transfer drops. The office feels more professional immediately.
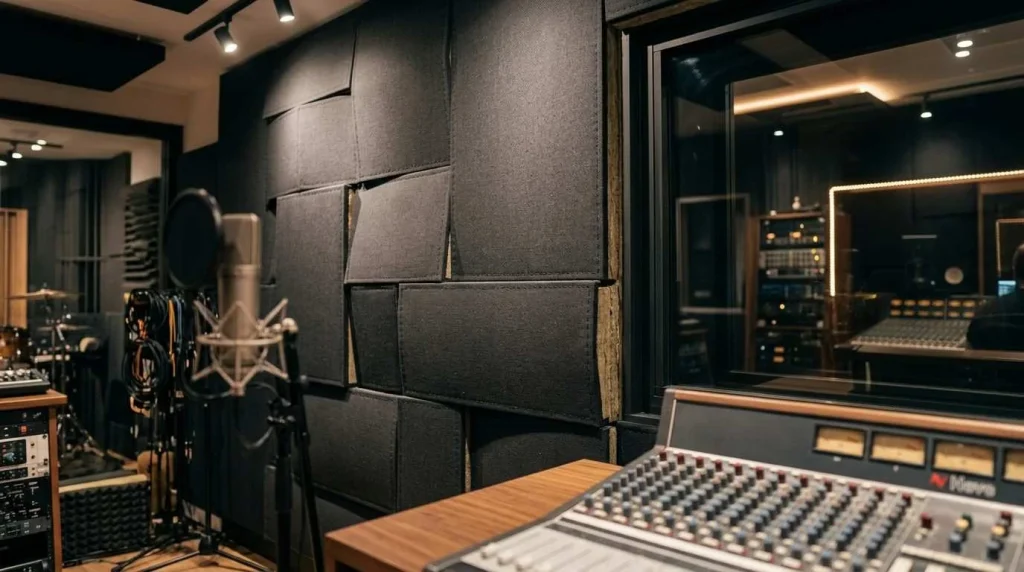
Studio Walls and Ceilings
Recording studios face unique challenges. Outside vibration from traffic or machinery travels through structures. It contaminates recordings as low-frequency rumble.
Treat walls and ceilings with dampening layers before adding acoustic absorption. This two-step approach handles both vibration and reverberation. Recordings come out clean without unwanted noise.
Step-by-Step Installation Process
Clean Everything First
Success starts with preparation. Surfaces must be absolutely clean. Oil, dust, or rust prevents proper adhesion. Materials peel off within weeks when surfaces weren’t cleaned right.
Use degreasing alcohol on metal surfaces. Wipe thoroughly. Let dry completely. Check for rust and sand it smooth if found.
Temperature matters too. Work in spaces above 60°F. Cold materials don’t stick well. They fight you when trying to conform to surfaces.
Cut Smart Patterns
Make cardboard templates first. Trace the shapes you need. Transfer patterns to dampening material. Cut slightly oversized allowing final trimming during installation.
Sharp utility knives slice through dampening materials cleanly. Dull blades tear and create ragged edges. Replace blades often. Clean cuts make installation easier.
Apply with Pressure
Peel the backing paper exposing sticky adhesive. Position material carefully. Once it touches, repositioning gets difficult.
Press firmly using hard rollers. Start from centers and work outward. This forces trapped air toward edges. Roll multiple times ensuring complete contact.
Check edges carefully. Lifting indicates insufficient pressure. Re-roll problem spots. Proper installation means material stays put permanently.
Focus Coverage Strategically
You don’t need 100% coverage everywhere. Target high-vibration zones instead. Large flat panels vibrate most. These need treatment priority.
Corners and edges vibrate less. They need less material. This strategic approach saves money while achieving 80% of maximum possible improvement.
Most installations perform well treating just 30-40% of total surface area. Smart placement beats random complete coverage every time.
Beyond Just Noise Reduction
Sound dampening sheets provide bonus benefits people don’t expect. The materials block heat transfer pretty well. Mechanical rooms stay cooler. HVAC systems work less hard. Energy costs drop slightly.
The thermal barrier effect accumulates over years. Fuel savings eventually offset material costs. Not the main reason to install dampening. But a nice benefit nonetheless.
Managing Installation Costs
Quality materials for a typical office renovation run PKR 25,000-50,000 depending on space size. Studio installations might need PKR 60,000-100,000 for comprehensive treatment.
Professional installation adds labor costs. Expect PKR 30,000-60,000 for expert application. Pros work faster and guarantee results. DIY saves money but takes more time.
Budget allocation strategy: Put 50% toward HVAC ducts and equipment. Allocate 30% for partitions and walls. Reserve 20% for doors and access panels.
What Improvement Looks Like
Set realistic expectations from the start. Sound dampening sheets reduce vibration noise by 30-50% typically. Older buildings with more rattling surfaces show bigger improvements. Newer construction sees smaller but still meaningful gains.
The difference feels obvious immediately. Machinery hum drops noticeably. HVAC rumble nearly disappears. Spaces feel calmer and more professional.
Measurement equipment shows 3-6 decibel reductions with proper treatment. That might not sound like much. But perceived noise drops by half. The change really impacts daily comfort.
Mistakes That Waste Money
Skipping surface prep causes most failures. People rush this step. Dampening material peels within months. The whole project fails because they didn’t clean properly first.
Insufficient rolling creates air pockets. These voids allow continued vibration. Treatment doesn’t work right. Always roll thoroughly across entire surface area.
Wrong material selection wastes money too. Asphalt products fail in hot locations. Thin materials lack mass for effective dampening. Research specifications carefully before buying anything.
Combining Multiple Treatments
Sound dampening sheets work best alongside other acoustic solutions. Add mass-loaded vinyl barriers for transmission blocking. Include acoustic panels for absorption. Seal gaps with acoustic caulk.
Layered approaches deliver superior results. Each treatment addresses different acoustic problems. Together they create comprehensive solutions impossible with single materials.
Diminishing returns limit practical treatment though. Most spaces achieve 85% of maximum improvement using dampening plus one secondary treatment. Going beyond that costs more than the marginal benefit justifies.
Long-Term Performance
Quality installations last indefinitely. Butyl materials don’t break down from age, temperature, or vibration. The permanent bond means one-time work delivering ongoing benefits.
Maintenance requirements? Basically zero. Materials stay hidden behind panels working silently. Occasional inspection during renovations verifies everything still looks good. Problems rarely develop with proper installation.
Making Your Decision
Start by identifying worst noise sources. Is it HVAC rumble? Equipment vibration? Partition noise transfer? Focus treatment where problems exist rather than treating everything equally.
Determine your budget next. Quality materials cost more but perform better and last longer. Economy options save upfront but might need replacing sooner.
Consider installation approach. DIY works fine with patience and care. Professional installation guarantees results and saves time. Choose based on your skills, available time, and budget constraints.
Why This Matters Now
Poor acoustics cost businesses real money. Productivity drops in noisy environments. Recording quality suffers. Client impressions weaken. These problems compound daily.
Sound dampening sheets fix underlying causes rather than masking symptoms. Treatment addresses vibration at the source. Improvements last decades. One investment solves problems permanently.
Stop accepting noise as unavoidable. Solutions exist. They’re affordable. Results show immediately. Every day you wait costs more than treatment would.
Getting Started Today
Measure spaces needing treatment. Calculate surface areas requiring coverage. Determine 30-40% of that for material quantities needed.
Research available products. Compare specifications and prices. Read reviews from similar installations. Contact local suppliers for current pricing and availability.
Plan installation timing. Some projects happen during regular hours. Others need weekend work avoiding business disruption. Schedule accordingly ensuring minimal operational impact.
Execute the plan completely. Partial treatment delivers partial results. Follow through ensures full benefits from your investment.
Conclusion
Strategic sound dampening sheets application transforms problematic spaces into acoustically comfortable environments. The proven technology stops vibration before it creates noise. Whether treating HVAC systems, equipment rooms, offices, or studios, proper material selection and careful installation deliver measurable improvement. Invest modest time and reasonable funds achieving professional acoustic quality. Experience how quiet, controlled spaces improve everything happening within them.
Frequently Asked Questions
1. How do sound dampening sheets differ from acoustic panels?
Dampening sheets control vibration in metal and hard surfaces. They stop panels from shaking and creating noise. Acoustic panels absorb sound waves already bouncing around spaces. Dampening prevents noise creation. Panels manage existing noise. Most commercial spaces benefit from combining both approaches for complete acoustic control.
2. Which areas need dampening treatment most urgently?
HVAC ductwork provides biggest improvement per area treated. Main trunk lines create constant rumble throughout buildings. Equipment enclosures come second, stopping machinery vibration from broadcasting. Office partitions rank third, reducing noise transfer between workspaces. Start with ducts, add equipment treatment, then expand based on remaining budget and specific needs.
3. Can we install dampening sheets ourselves or hire professionals?
Simple installations work fine DIY with basic tools and patience. Clean surfaces thoroughly, apply material carefully, roll firmly ensuring adhesion. Most people complete small projects over weekends successfully. Large commercial projects benefit from professional installation though. Pros guarantee results, work faster, and handle complex applications correctly first time.
4. How much do quality sound dampening sheets actually cost?
Premium butyl materials run PKR 800-1,500 per square foot. Typical office renovation needs PKR 25,000-50,000 in materials. Studio installations might require PKR 60,000-100,000 for comprehensive coverage. Professional installation adds PKR 30,000-60,000 labor. Budget projects use economy materials saving 30-40% but accepting reduced performance and shorter lifespan.
5. Do dampening sheets really work or just marketing hype?
They absolutely work when installed properly. Measurable noise reduction of 3-6 decibels occurs with good treatment. This translates to 30-50% less perceived noise. Improvement feels dramatic in previously untreated spaces. Realistic expectations matter though – sheets reduce vibration noise substantially but won’t create complete silence. Proper materials, clean surfaces, and strategic placement ensure success every time.